
You're sitting at the kitchen table with your theory-test app open, trying to remember whether 60 mph means 73 metres or something closer to 60. Then you picture the same speed on a wet dual carriageway, with traffic ahead and brake lights appearing suddenly. The number you memorise for the test starts to feel less like an answer and more like a warning.
That's the right instinct. Theory test stopping distances are not just a memory exercise. They teach you how quickly a modest increase in speed can extend the space needed to stop, and why the safe gap you leave on a real road may need to be much greater than the dry-road answer in a multiple-choice question.
Table of Contents
- Why Stopping Distances Trip Up So Many Learners
- Thinking Distance and Braking Distance Explained
- The Official Highway Code Stopping Distances by Speed
- Car Lengths and Seconds Behind the Vehicle in Front
- How Weather Changes the Figures You Learn
- Memory Tricks That Actually Stick
- Worked Practice Questions for the Theory Test
- Using Stopping Distance Knowledge on Real Lessons
- Quick Reference and Where to Practise Further
- Bringing the Exam Answer and the Real Road Together
Why Stopping Distances Trip Up So Many Learners
Stopping-distance questions look straightforward because each one appears to ask for a single number. The difficulty is that the number represents several stages of driving, not one instant.
A driver first has to perceive a hazard, understand what it means and decide to act. The vehicle continues moving during that thinking process. The driver then applies the brakes, and the car needs further distance before it comes to a complete stop. Those are the three forces you need to keep in mind:
- Perception, recognising that something requires action.
- Reaction, moving from noticing the hazard to applying the brake.
- Braking, slowing the vehicle from its current speed to a halt.
The official figures assume an alert driver on a dry road. That makes them consistent for revision, but it also means they aren't a universal promise about what your car will do in every situation. Rain, ice, worn tyres, poor visibility, a gradient or a delayed reaction can all make the stopping distance longer.
Practical rule: Treat the theory-test figure as the dry-road baseline, never as the maximum space you need.
Learners commonly make three mistakes. They remember only the overall number and forget what it represents, they swap thinking distance with braking distance, or they learn the dry figures without considering what changes when grip is reduced. A further trap is assuming that a speed increase produces a similar increase in stopping distance. It doesn't. Braking distance rises much more sharply.
By the end of this guide, you should be able to rebuild the official figures, picture them from the driver's seat and separate the exam answer from the safer real-road gap. That distinction is what turns memorisation into useful judgement.
Thinking Distance and Braking Distance Explained
Thinking distance is the ground covered while you recognise a hazard and react. Braking distance starts when the brakes are applied and ends when the car stops. The total is simple:
Total stopping distance = thinking distance + braking distance
At 30 mph, the Highway Code table gives a thinking distance of 9 metres, a braking distance of 14 metres and an overall stopping distance of 23 metres. At 70 mph, the figures are 21 metres, 75 metres and 96 metres respectively, as shown in the official Highway Code guidance on stopping distances.
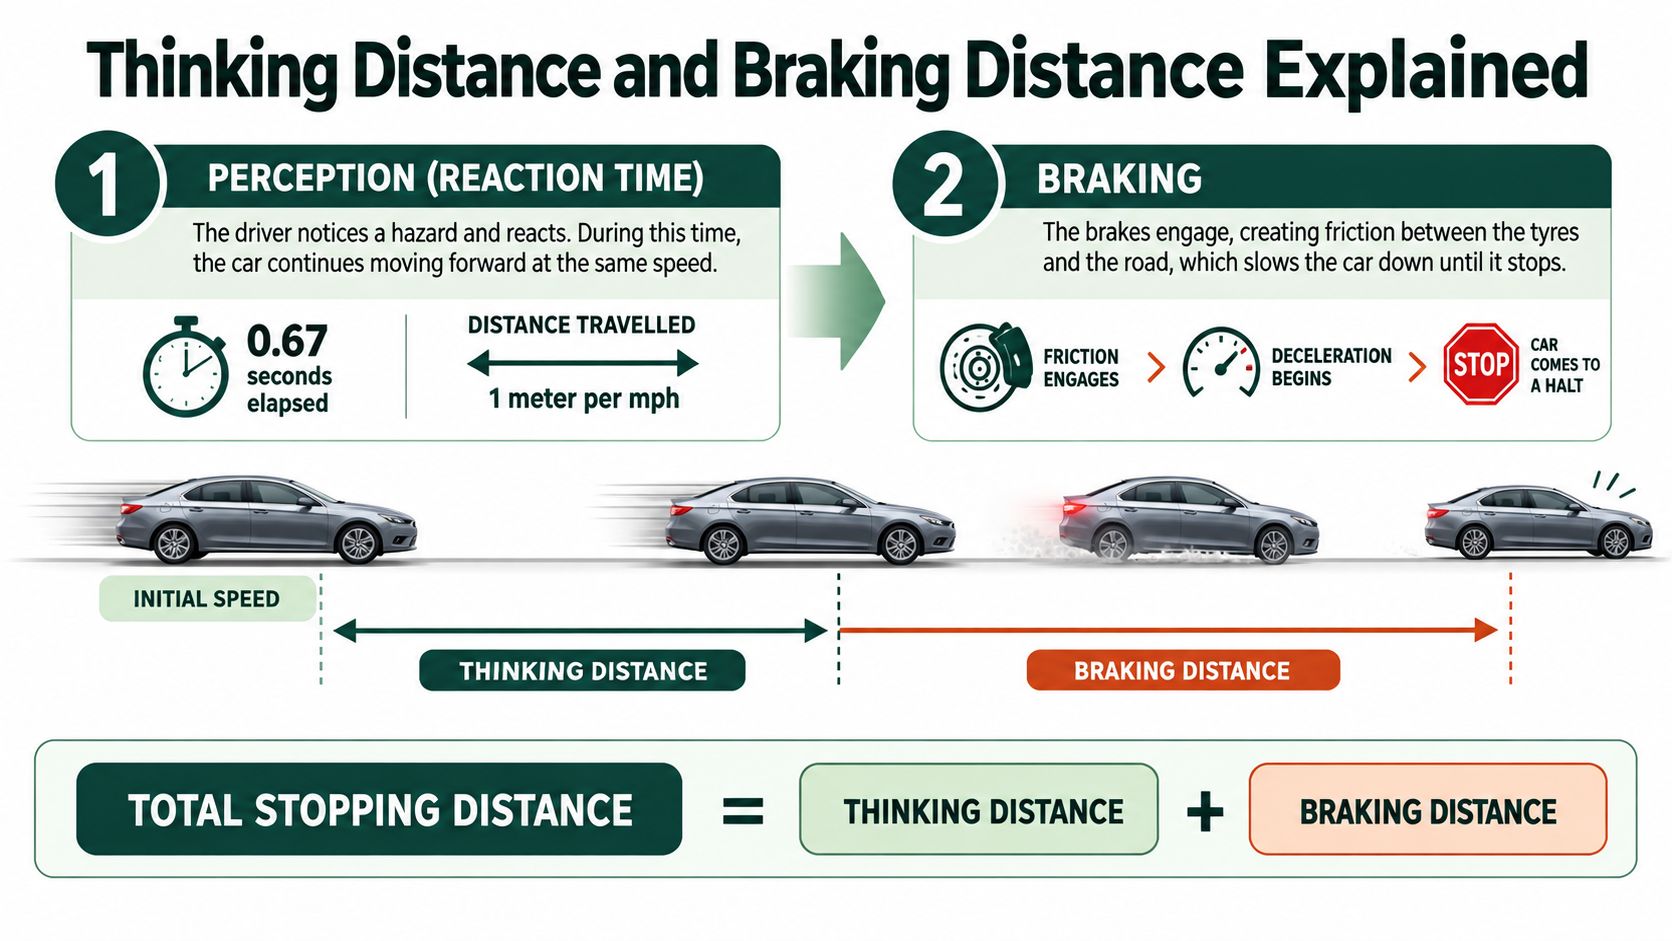
The thinking part increases steadily as speed rises. In the official table, it moves up by 3 metres each time speed increases by 10 mph. Braking distance behaves differently. It rises from 14 metres at 30 mph to 75 metres at 70 mph, because the energy that the brakes and tyres must manage increases disproportionately with speed.
That's why adding a fixed amount to the previous answer isn't reliable. A learner who remembers that 30 mph is 23 metres can't safely guess the 60 mph answer by doubling 23. The correct 60 mph total is 73 metres, with 18 metres of thinking distance and 55 metres of braking distance.
Rebuild the answer instead of guessing
When a question appears on screen, use this order:
- Identify the speed.
- Recall the thinking-distance figure.
- Recall the braking-distance figure.
- Add them to check the total.
- Ask whether the question is describing dry-road conditions or a changed surface.
The driver's foot only controls when braking begins. Once the brakes are applied, grip, tyres, brakes, road surface and gradient affect how far the car travels. That's why a single total is useful for a standardised exam, but incomplete as a real-world safety margin.
The Official Highway Code Stopping Distances by Speed
You are in a theory-test question, the speed shown is 40 mph, and two answers look plausible. Start with the official table, not a guess based on the previous speed. It gives each total as thinking distance plus braking distance, which makes the answer easier to check. The Highway Code stopping-distance revision guide can help you practise that structure.
| Speed | Thinking distance | Braking distance | Overall stopping distance |
|---|---|---|---|
| 20 mph | 6 m | 6 m | 12 m |
| 30 mph | 9 m | 14 m | 23 m |
| 40 mph | 12 m | 24 m | 36 m |
| 50 mph | 15 m | 38 m | 53 m |
| 60 mph | 18 m | 55 m | 73 m |
| 70 mph | 21 m | 75 m | 96 m |
The pattern matters more than trying to spot a neat doubling. At 20 mph, both parts are equal at 6 metres each. By 40 mph, braking is already twice thinking distance, at 24 metres against 12 metres. At 70 mph, braking is more than three times the thinking distance, at 75 metres against 21 metres. Thinking distance rises in regular steps, while braking distance increases much faster as speed rises.
That difference explains why adding the same amount to each answer fails. The table is the standard dry-road answer for the theory test, so learn the complete figures and the way each total is formed. On an actual lesson, your driving school instructor should help you leave a larger gap when the road is wet, icy, slippery or otherwise offering less grip. The exam figure is a reference point, not a safe target to place your bumper against.
A typical car length is often taken as 4 metres, giving the overall figures a useful visual scale. From 20 mph to 70 mph, the table works out at roughly three, six, nine, thirteen, eighteen and twenty-four car lengths. That comparison can make 96 metres at 70 mph feel less like an abstract number. UK road-safety guidance also describes 50 mph as 53 metres or 13 car lengths, 60 mph as 73 metres or 18 car lengths, and 70 mph as 96 metres or 24 car lengths. See the car-length stopping-distance comparison from Oxfordshire road-safety guidance.
For revision, say the two components aloud before saying the total. For example, 60 mph is 18 metres of thinking distance plus 55 metres of braking distance, making 73 metres. That small habit helps you catch a remembered total that belongs to a different speed, while your instructor can then relate the same figures to the road and conditions you meet during lessons.
Car Lengths and Seconds Behind the Vehicle in Front
Metres are precise, but they can be difficult to judge from the driver's seat. Car lengths and seconds give you more practical reference points.
At 20 mph, the official overall stopping distance is 12 metres, which is roughly three typical car lengths. At 50 mph, it is 53 metres, or about thirteen car lengths. At 70 mph, it is 96 metres, or about twenty-four car lengths. Those comparisons aren't intended to replace a proper following-distance check, but they show why sitting close to the vehicle ahead leaves very little room for error.
The more useful on-road habit is to judge the gap in time. In dry conditions, use the two-second rule:
- Choose a fixed point, such as a sign, lamp post or road marking.
- Watch the vehicle ahead pass it.
- Count “one thousand and one, one thousand and two”.
- You should pass the same point no sooner than the end of the count.
If you reach the marker before finishing, ease back rather than braking sharply. Leave the gap to grow naturally.
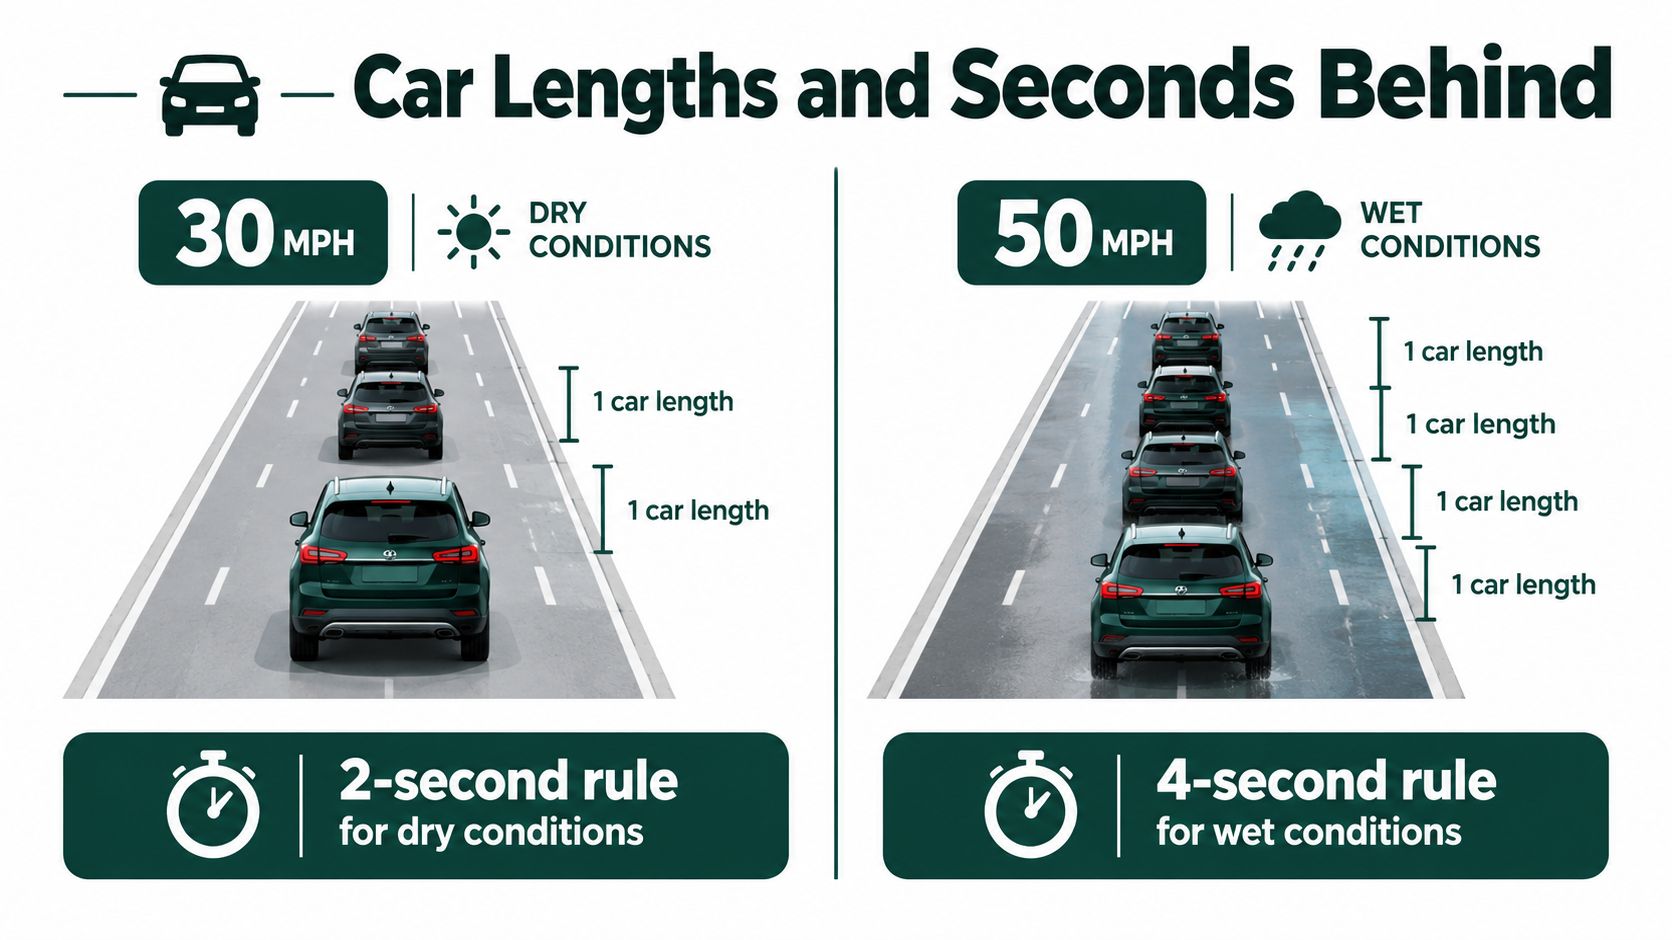
In wet conditions, extend the gap to at least four seconds. The extra time matters because the braking part of the stopping distance grows when the tyres have less grip. It also gives you more time to see spray, standing water or brake lights through a windscreen that may be harder to read.
Practise this on quiet roads between lessons, but don't turn it into a target that overrides judgement. If visibility is poor, the road is slippery or traffic is unpredictable, slow down and create more space.
How Weather Changes the Figures You Learn
The dry-road table is the exam baseline. Real roads can demand a much larger margin.
Recognised UK guidance says that stopping distances should be at least double the dry-road figure in wet weather, while icy conditions can make them as much as ten times higher. The change mainly affects braking distance, because the tyres have less grip. Thinking distance still depends on the driver and the speed, so it doesn't disappear just because the surface is wet.
Take the 50 mph row. In the dry, the table gives 15 metres of thinking distance and 38 metres of braking distance, making 53 metres overall. If you apply the wet-road rule of thumb to the braking component, that becomes about 76 metres of braking distance, plus the same 15 metres of thinking distance, for an approximate overall figure of 91 metres. On ice, multiplying the braking component by ten gives about 380 metres, plus the thinking distance, for an approximate total of 395 metres. These are warning calculations, not measurements you should treat as exact.
| Speed | Dry, thinking + braking | Wet, approximately doubled braking | Icy, approximately ten-times braking |
|---|---|---|---|
| 20 mph | 6 m + 6 m = 12 m | 6 m + about 12 m = about 18 m | 6 m + about 60 m = about 66 m |
| 30 mph | 9 m + 14 m = 23 m | 9 m + about 28 m = about 37 m | 9 m + about 140 m = about 149 m |
| 40 mph | 12 m + 24 m = 36 m | 12 m + about 48 m = about 60 m | 12 m + about 240 m = about 252 m |
| 50 mph | 15 m + 38 m = 53 m | 15 m + about 76 m = about 91 m | 15 m + about 380 m = about 395 m |
| 60 mph | 18 m + 55 m = 73 m | 18 m + about 110 m = about 128 m | 18 m + about 550 m = about 568 m |
| 70 mph | 21 m + 75 m = 96 m | 21 m + about 150 m = about 171 m | 21 m + about 750 m = about 771 m |
The UK guidance on safe stopping distances in different conditions makes the distinction clear. The figures used in revision questions are consistent dry-road answers, while the road outside your window may require lower speed and much more space.
Don't try to convert the table into a precise icy-road measurement during a drive. Use it to understand the direction and scale of the risk. If the road is icy, increase your distance substantially, reduce speed smoothly and avoid making sudden inputs.
Memory Tricks That Actually Stick
A useful memory method has two layers. First, learn the official totals. Then learn the thinking and braking parts so you can check yourself under pressure.
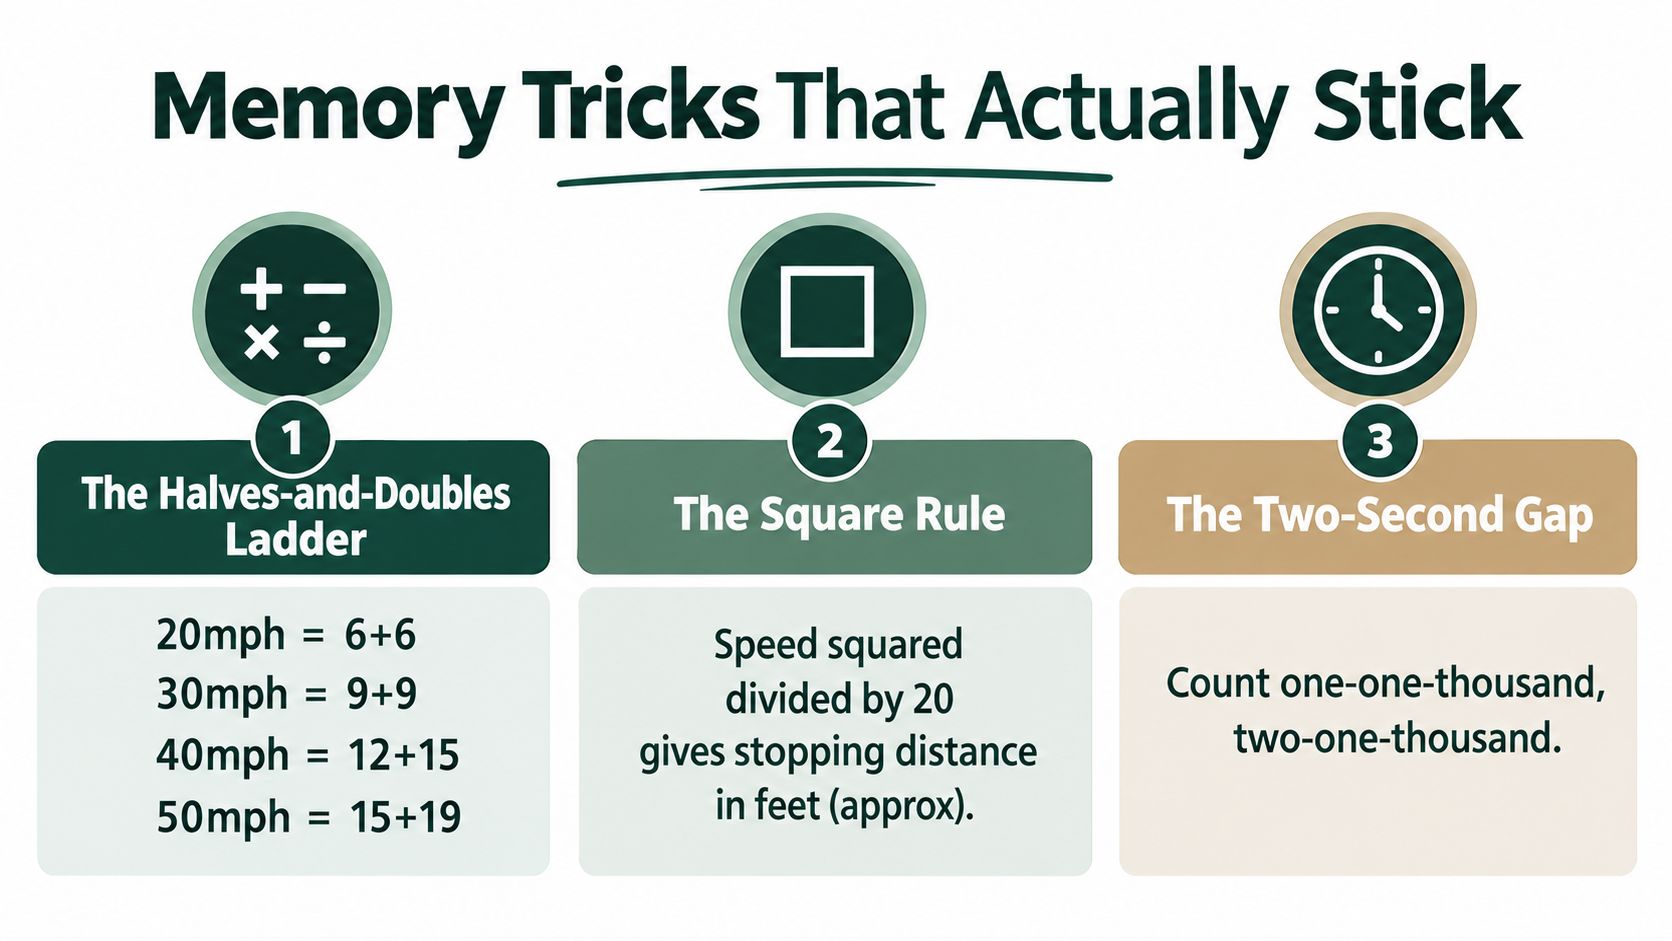
The table can be grouped into a simple ladder:
- 20 mph: 6 + 6 = 12 m
- 30 mph: 9 + 14 = 23 m
- 40 mph: 12 + 24 = 36 m
- 50 mph: 15 + 38 = 53 m
- 60 mph: 18 + 55 = 73 m
- 70 mph: 21 + 75 = 96 m
The first numbers, 6, 9, 12, 15, 18 and 21, are the thinking-distance sequence. Say them aloud with the speed. The second sequence is less regular, so attach each braking figure to its speed instead of trying to invent a formula during the test.
A short spoken rhythm can help: “Twenty, twelve. Thirty, twenty-three. Forty, thirty-six. Fifty, fifty-three. Sixty, seventy-three. Seventy, ninety-six.” It isn't elegant, but it is quick to repeat while walking, cooking or waiting for a bus.
Write the six totals on a Post-it and place it somewhere you naturally look, such as the fridge. Cover the answers and test yourself rather than repeatedly reading them. Learners who want a structured approach can also improve memory with spaced repetition, reviewing the figures at intervals instead of cramming them in one sitting.
Don't let a mnemonic replace understanding. If you know that the total equals thinking distance plus braking distance, a forgotten answer is recoverable. If you only remember a rhyme, one nervous moment can make the whole list vanish.
Worked Practice Questions for the Theory Test
These practice questions use the same dry-road table and weather rule that underpin common revision exercises. Read the question first, choose an answer, then check the working.
Question one
What is the overall stopping distance at 50 mph on a dry road?
- A. 38 metres
- B. 50 metres
- C. 53 metres
- D. 73 metres
Working: The 50 mph row gives 15 metres of thinking distance and 38 metres of braking distance.
15 + 38 = 53 metres
Answer: C, 53 metres.
The tempting answer is 38 metres because that is the braking distance alone. The question asks for the overall stopping distance, so both parts must be included.
Question two
At 60 mph, which figure represents thinking distance?
- A. 18 metres
- B. 55 metres
- C. 60 metres
- D. 73 metres
Working: Find the 60 mph row. It reads 18 metres thinking distance, 55 metres braking distance and 73 metres overall.
Answer: A, 18 metres.
This question tests whether you can separate the components. The largest figure is the total, not the thinking distance.
Question three
A car is travelling at 40 mph on a wet road. Using the recognised wet-road rule of thumb, what approximate total should a driver allow?
- A. 36 metres
- B. 48 metres
- C. 60 metres
- D. 240 metres
Working: The dry 40 mph figure is 12 metres thinking distance plus 24 metres braking distance.
Wet braking distance is approximately doubled:
24 × 2 = 48 metres
Add the thinking distance:
12 + 48 = about 60 metres
Answer: C, about 60 metres.
The dry answer remains important for the test, but it isn't the space you should automatically accept in heavy rain. For more practice on margins and related questions, use the Safety Margins theory quiz.
The habit behind all three questions is the same: identify the speed, identify the part being asked for and add the components only when the question requests the total.
Using Stopping Distance Knowledge on Real Lessons
Your instructor can turn the table into a driving exercise rather than leaving it on a revision screen.
Start with the two-second gap in dry conditions. Ask your instructor to choose a roadside marker, then count from the moment the vehicle ahead passes it. Repeat the exercise at different speeds and on different roads. You're not trying to measure a perfect number of metres. You're learning what a safe time gap feels like and noticing how quickly it disappears when you follow too closely.
Commentary helps. Say the speed, the surface and the hazard aloud: “Thirty miles per hour, wet road, parked car ahead, extra space.” That forces you to look beyond the vehicle immediately in front and gives you a reason to lift off the accelerator early.
Build the lesson around reference points
Lamp posts, chevrons, road signs and junction entrances can all help you discuss where braking should begin. Your instructor may ask you to identify a hazard first, ease off, cover the brake and then stop progressively. The aim is not to brake heavily at every reference point. It is to create time for observation and leave the car balanced.
In rain, fog or darkness, make the adjustment before the hazard becomes urgent. Increase the following gap, reduce speed and avoid relying on the dry table as permission to continue at the same pace. The emergency-stop driving guide can support the practical side of understanding how quickly a vehicle needs to slow once braking starts.
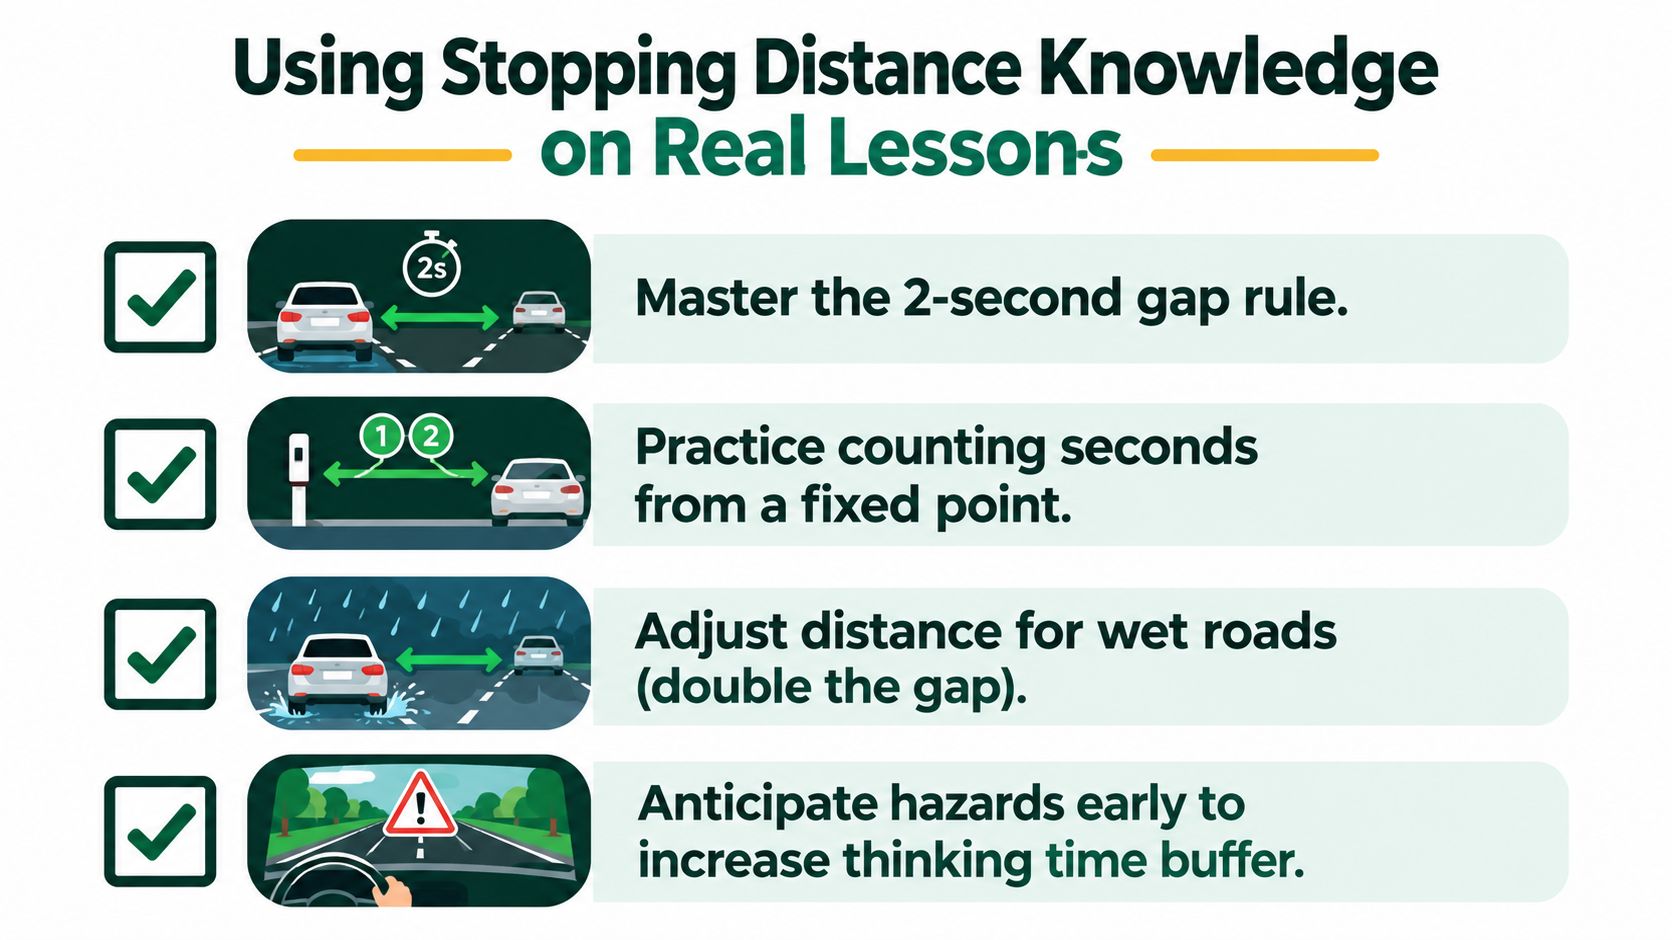
Use the lesson debrief precisely. Ask which speed you were travelling at, how much space you left, when you first saw the hazard and whether the surface changed your decision. Your target for the next lesson might be earlier observation, a wider gap or smoother speed reduction. That is more useful than just being told to “be careful”.
Quick Reference and Where to Practise Further
Before opening another mock question, cover the table's right-hand column and say each stopping-distance total aloud. Then uncover it and check your answers. This turns the figures into retrieval practice rather than another passive read.
For authoritative revision, revisit the official Highway Code stopping-distance table, especially the guidance on braking, stopping and following distance. Read it alongside your notes, remembering that the exam tests the recognised dry-road figures, while real roads may require a much larger gap in rain, ice, darkness or poor visibility.
Use the DVSA's official theory-test materials to practise hazard-perception clips. Click when a hazard begins to develop, not only when it becomes urgent. After each mock test, record the stopping-distance questions you miss and explain the mistake in your own words.
Take those notes to your driving school. Ask your instructor to plan a commentary exercise around following gaps, early hazard recognition and the extra space you would leave when grip is reduced. This connects revision with safer decisions behind the wheel.
Bringing the Exam Answer and the Real Road Together
For the test, remember the dry-road ladder from 20 mph at 12 metres through to 70 mph at 96 metres. The table's thinking distance rises in regular steps, while braking distance grows much faster. In wet conditions, use the recognised rule that braking distance can at least double. On ice, it can become dramatically greater.
For real driving, don't treat the dry figure as the gap you must leave and no more. Use at least a two-second gap in dry conditions, extend it to four seconds or more in wet conditions, and leave substantially more space when grip is severely reduced.
At every junction, roundabout and dual-carriageway approach, name three things to yourself: your speed, the likely stopping distance and the extra margin required by the conditions. That one habit joins the exam answer to safer driving beyond the test centre.
Fast Track Driving Lessons matches learners with DVSA-approved instructors for intensive and semi-intensive manual or automatic tuition across England, Scotland and Wales. If you want to practise stopping-distance commentary alongside structured theory support and practical lessons, visit Fast Track Driving Lessons and arrange your next step.
Written by Fast Track editorial team.